Beginners Guide to Dual-Booting Arch Linux and Windows 11
NOTICE: THIS GUIDE IS WORK IN PROGRESS
An absolute beginners guide to installing Arch Linux alongside Windows 11 with pictures.
In this guide we will go over two different methods for setting up a Windows and Arch Linux dual-boot environment. The first method is for an already existing Windows 11 install. And in the second method we install Arch Linux first then Windows 11. The latter may be easier for you unless you already have Windows installed, and you don’t want to erase it. If you want to use the second method; install Arch Linux first; skip to Method 2 now.
Method 1: Windows Already Installed
First things first, we’ll need to allocate some free space for the Arch Linux install.
1. Make Space for Arch Linux
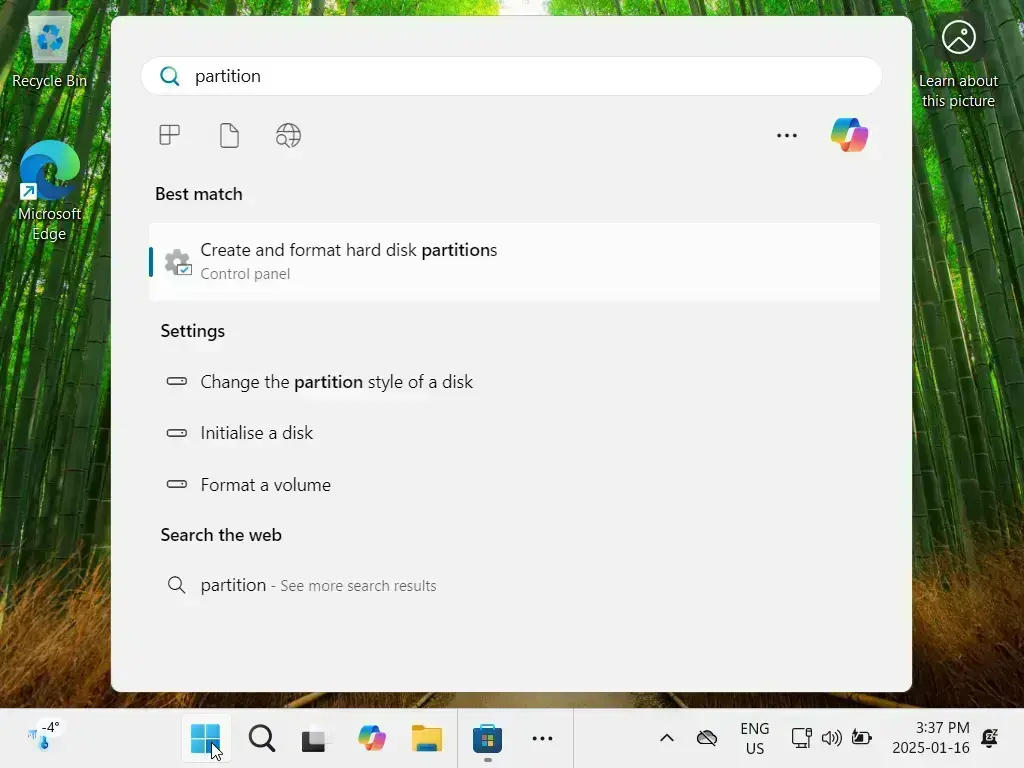
Start by opening Disk Management in Windows:
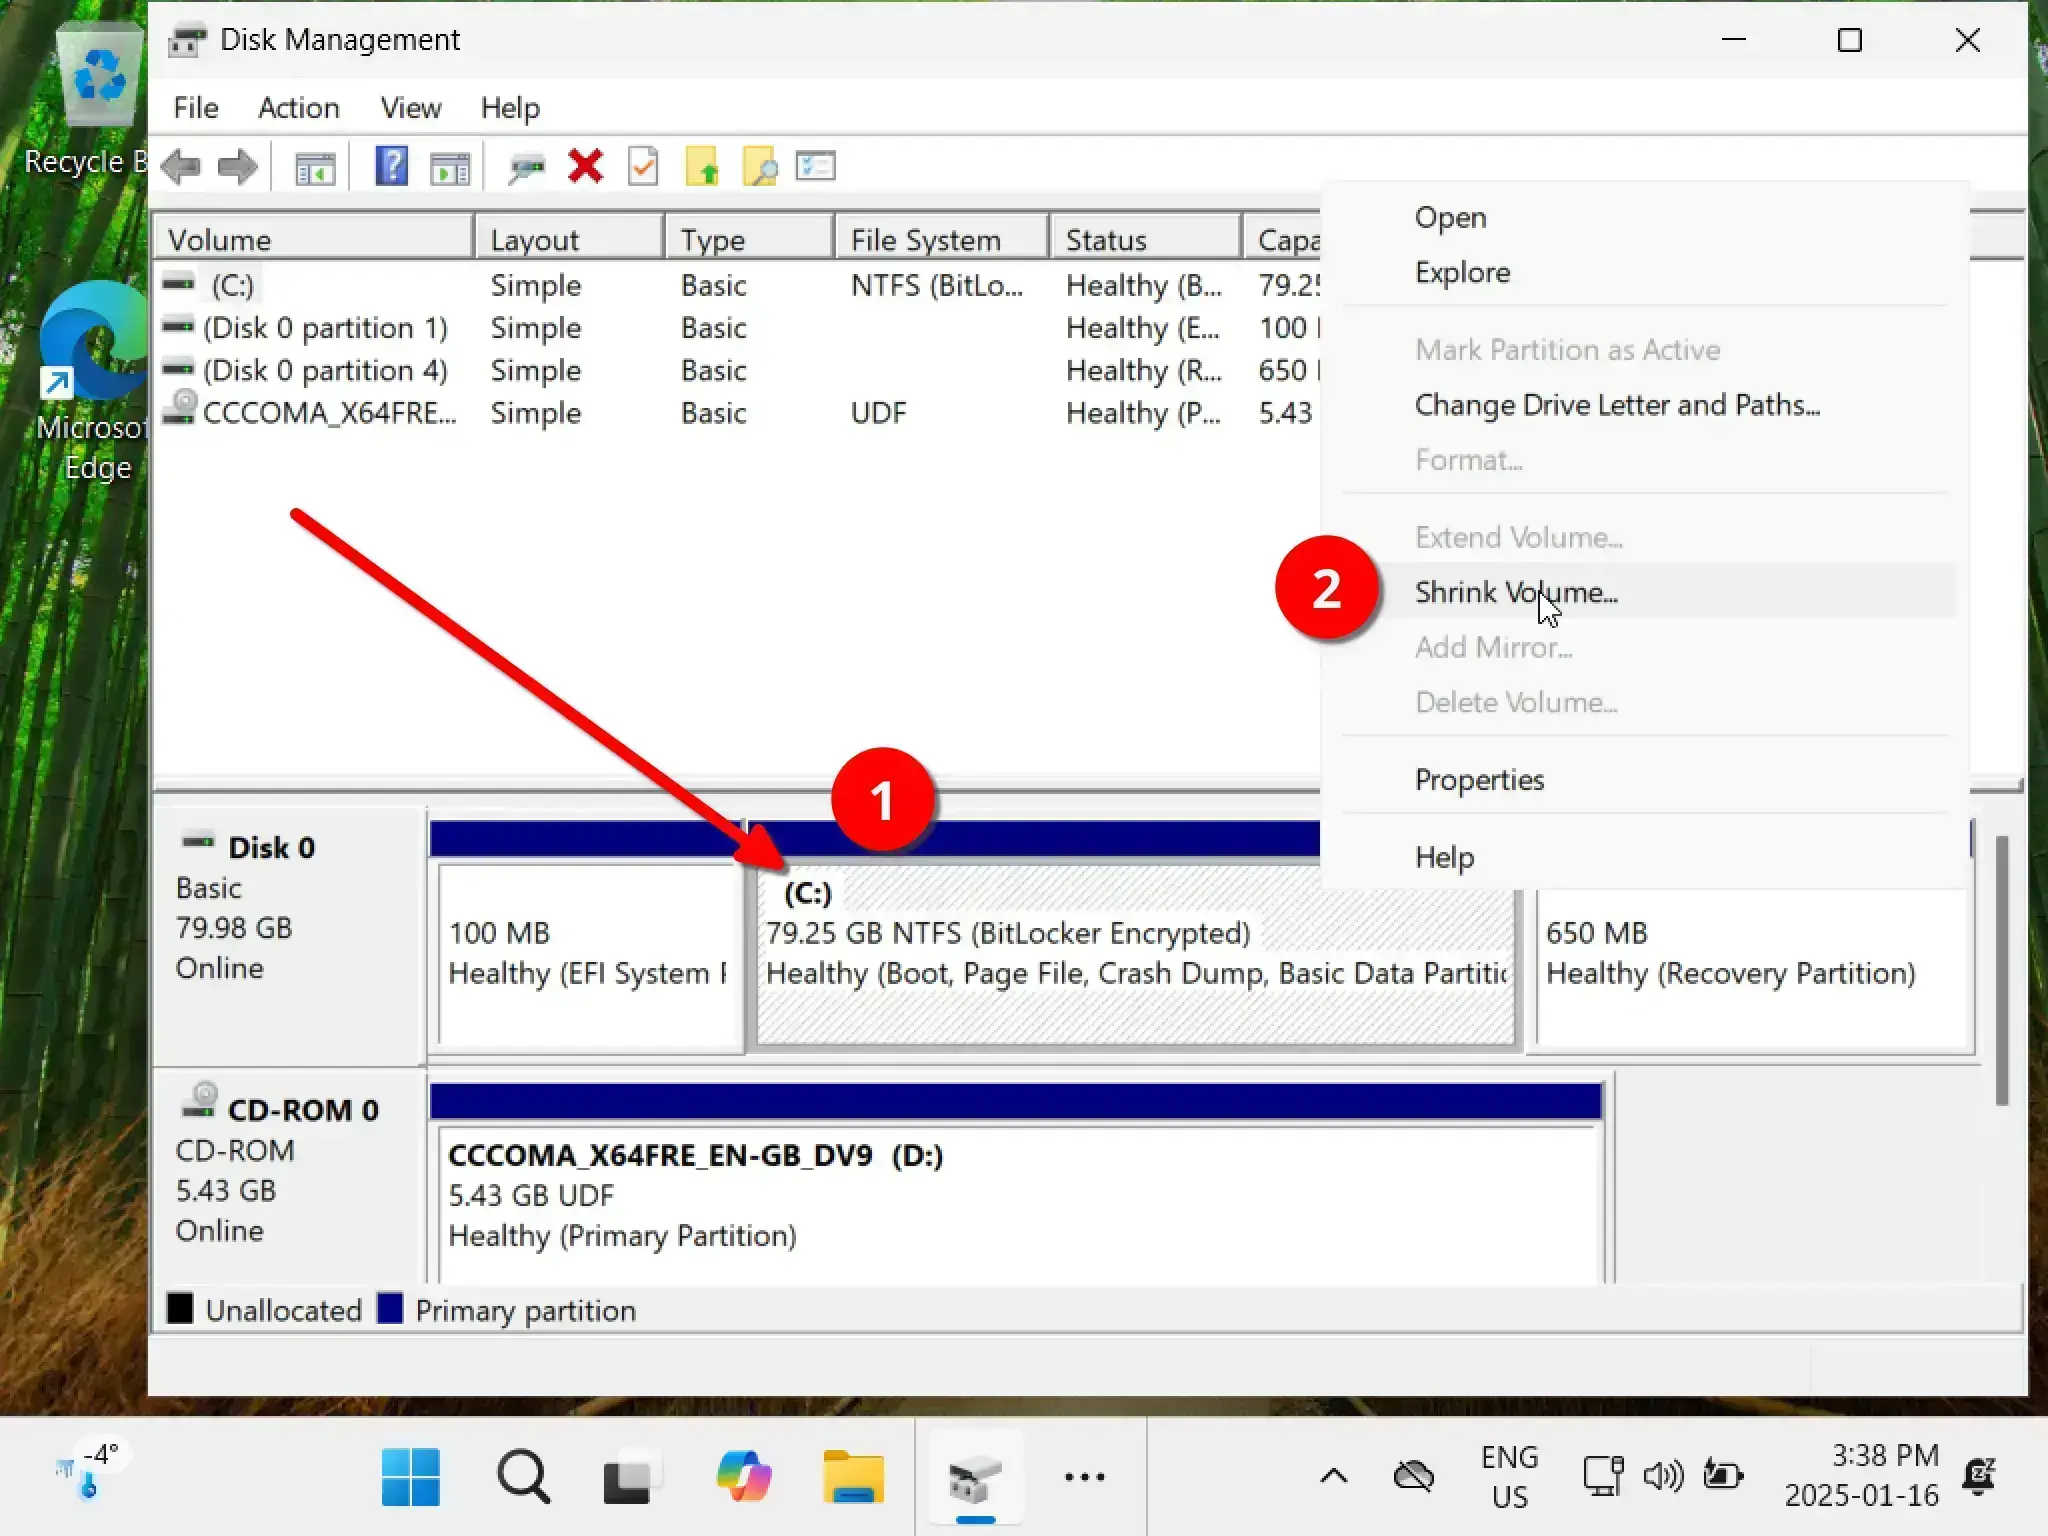
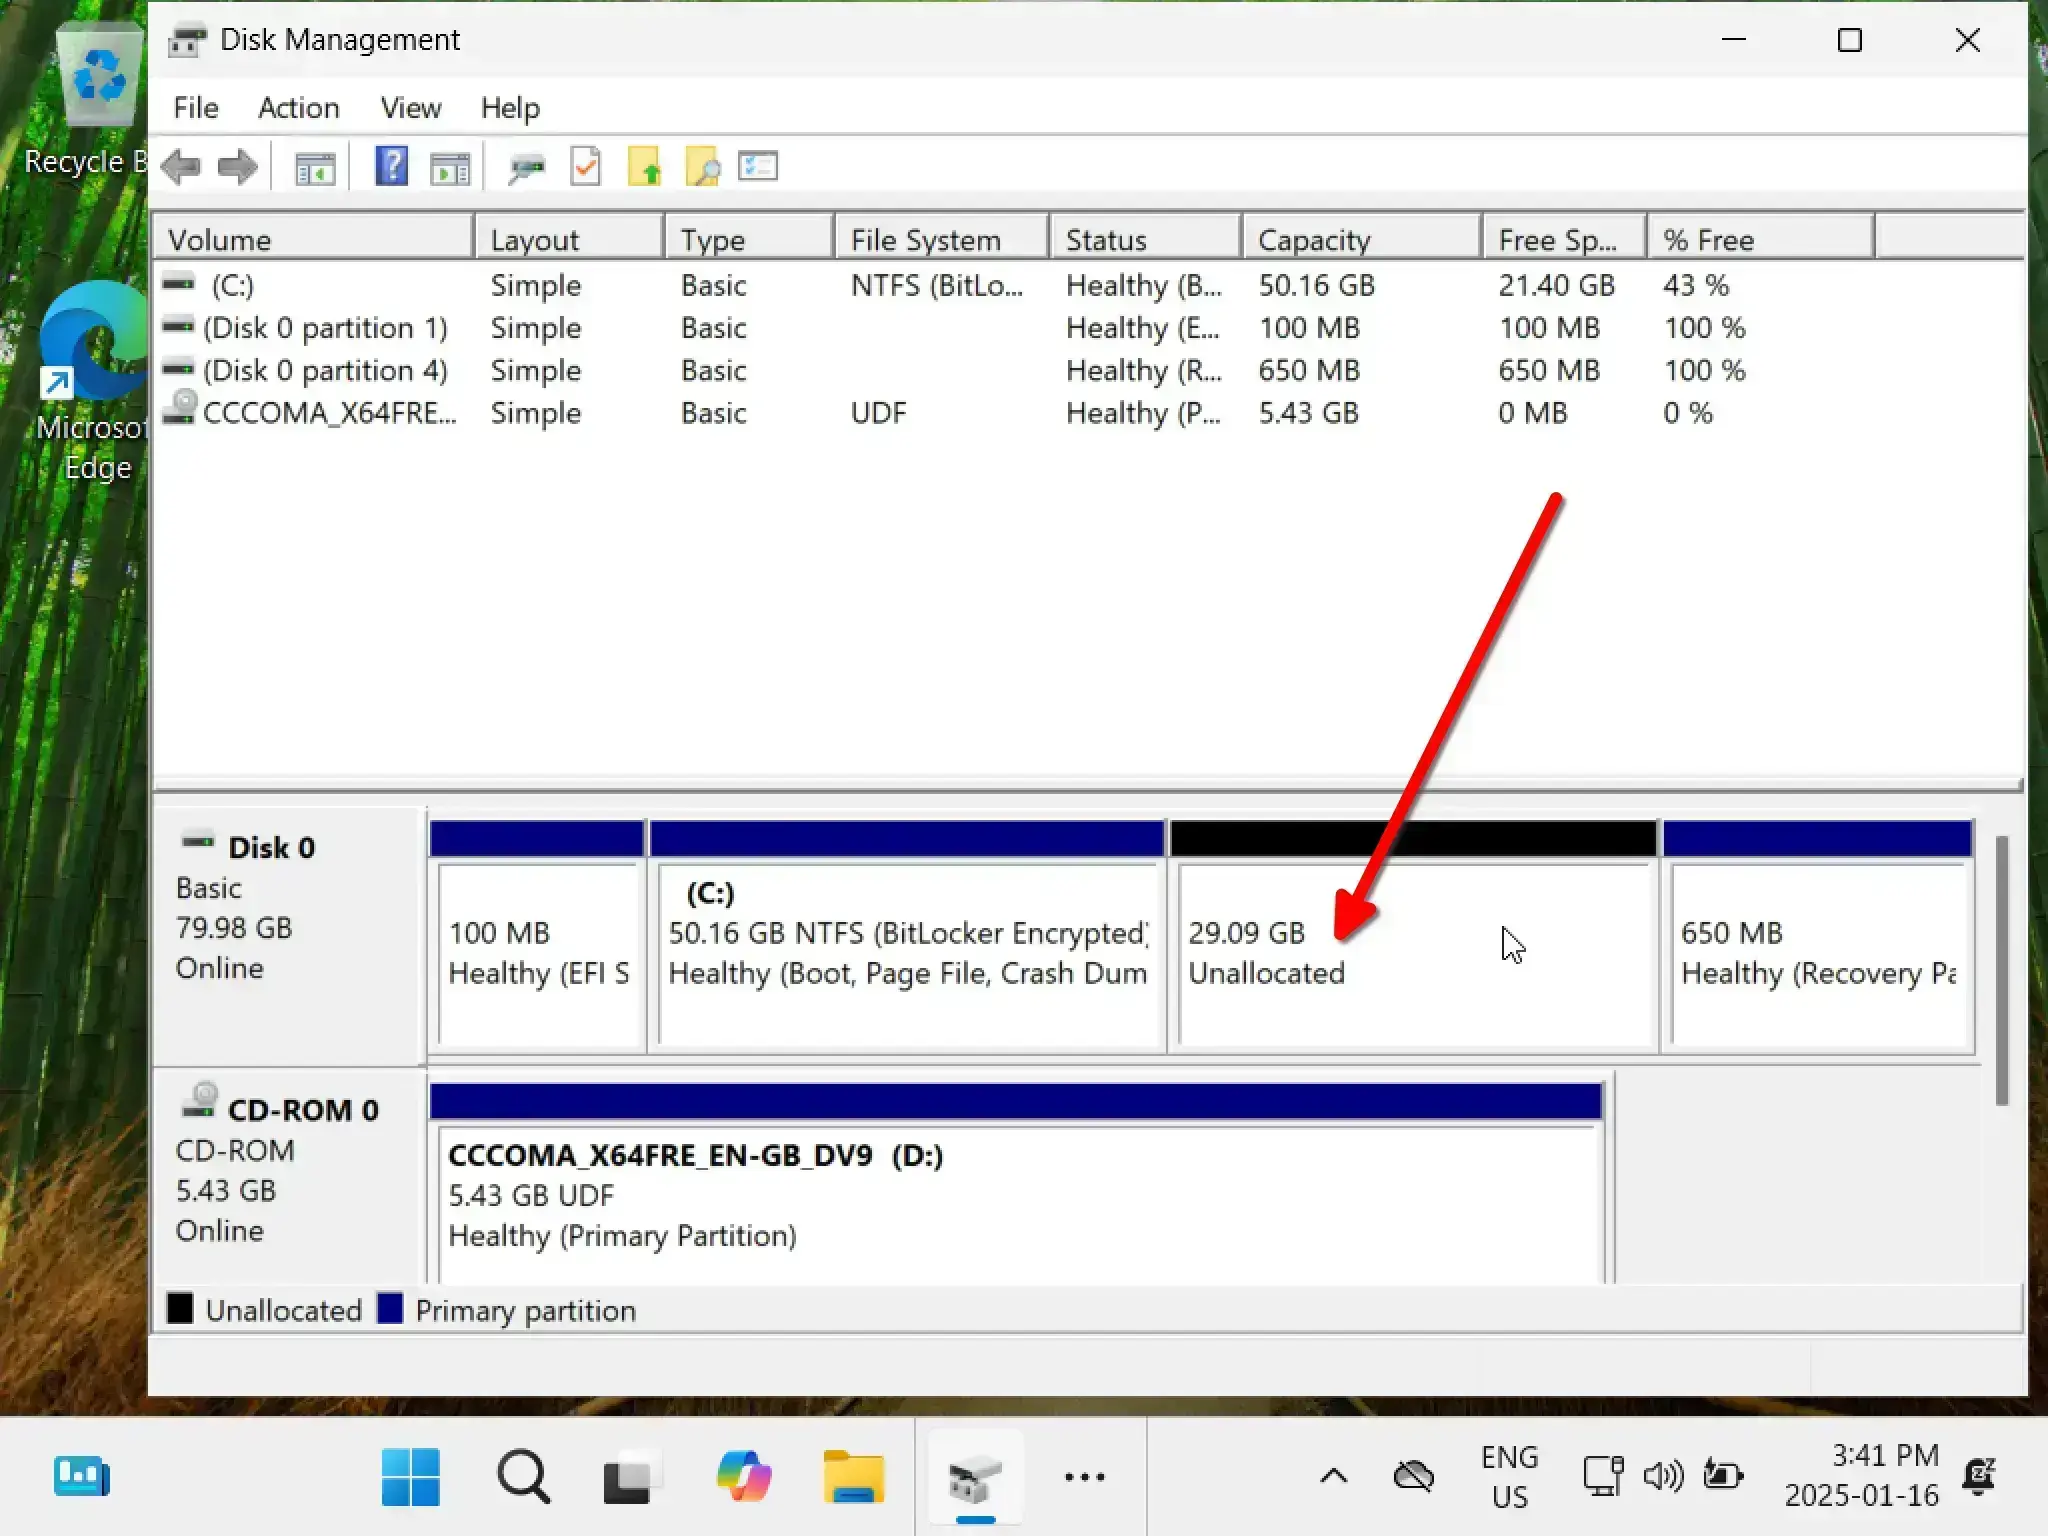
Then locate your (C:) partition. Right click it, then click “Shrink Volume…”:
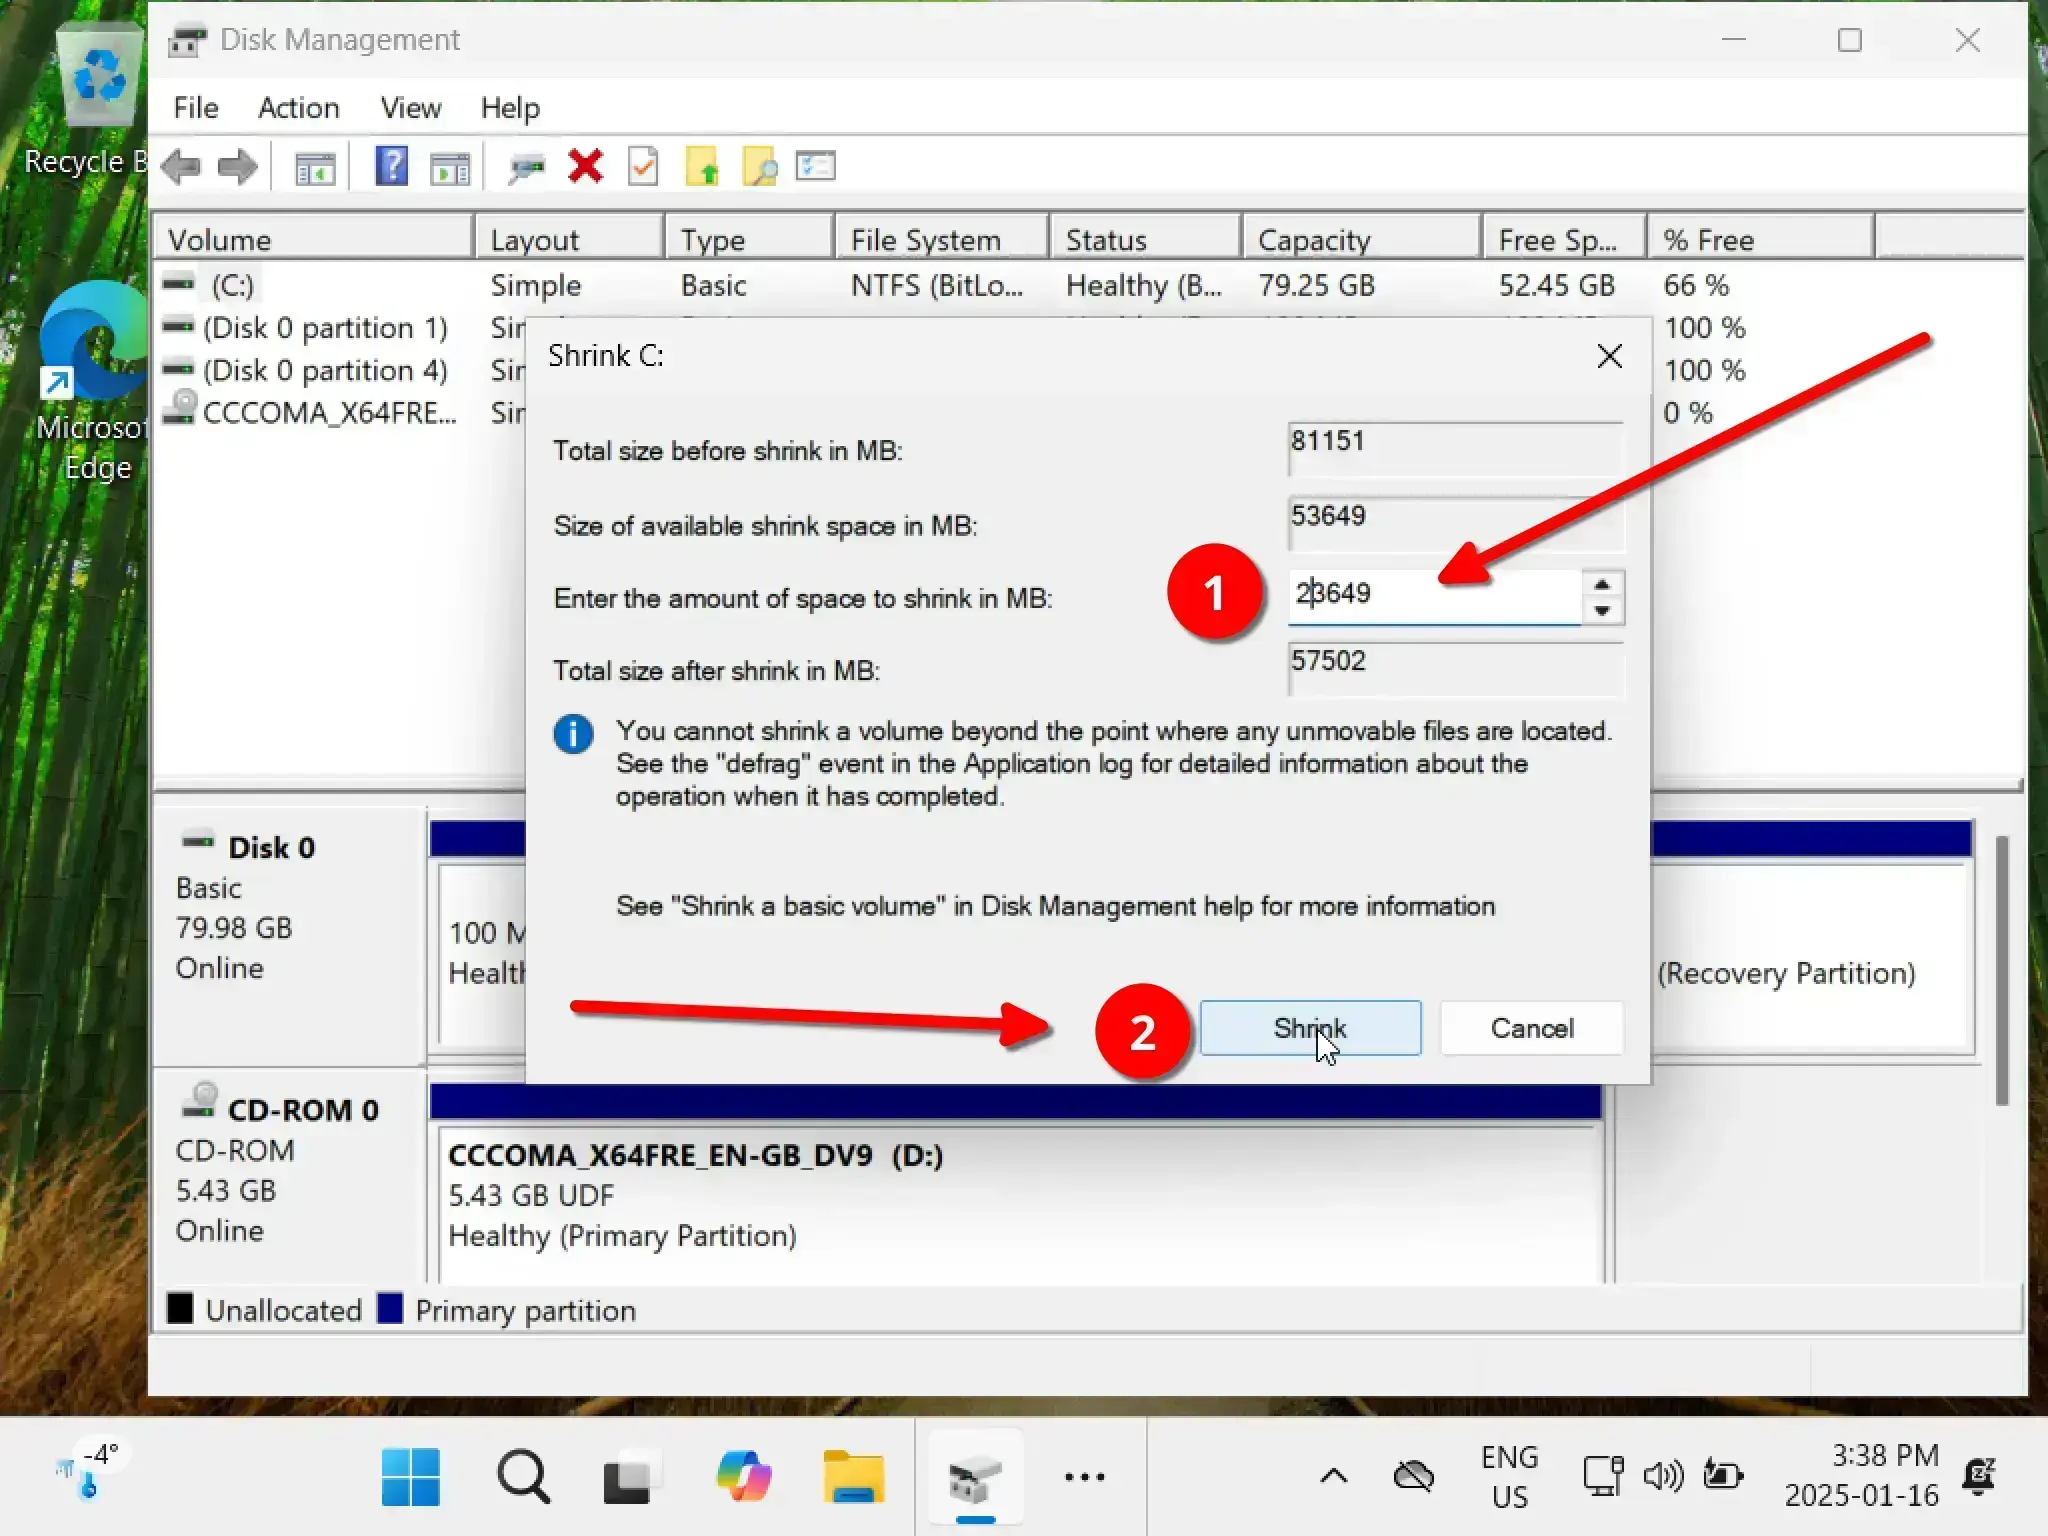
Enter the amount of space to shrink in MB. You can also think of this is the amount of space you want to give Linux.
100000 MBAfter entering the amount click “Shrink”:
You should now hav unallocated space for Arch Linux to use.
2. Creating a USB Flash Installation Medium
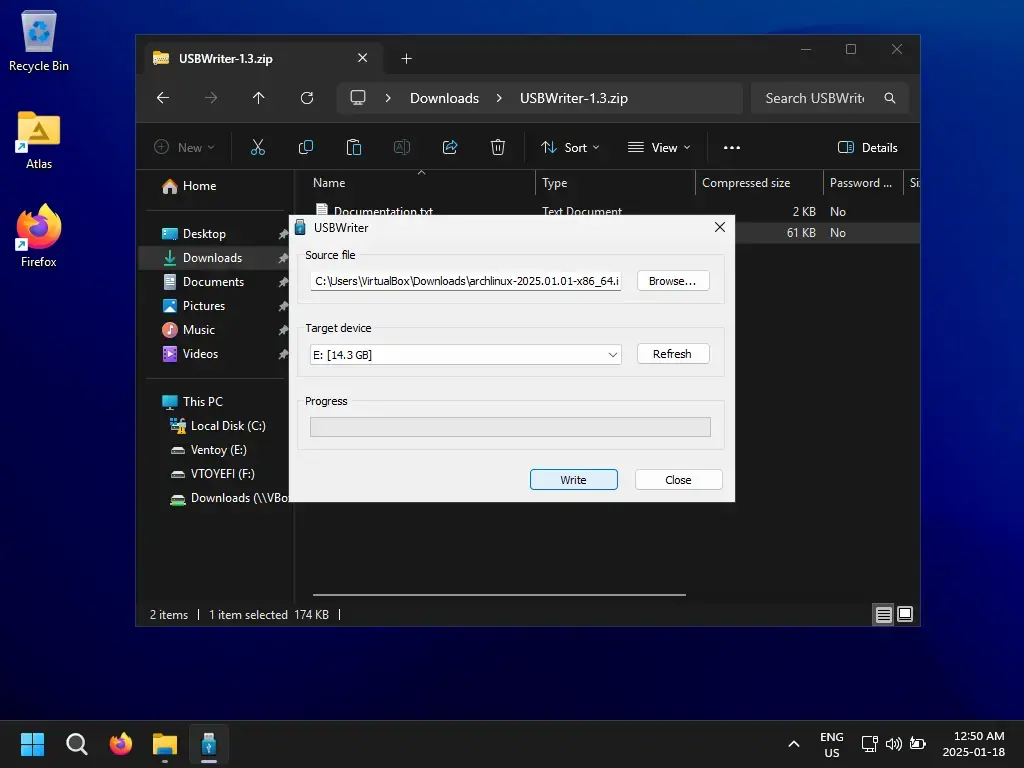
If you’re not sure or if you haven’t flashed the Arch Linux ISO to a usb flash drive yet I recommend using USBWriter since it’s simple to use and requires no special workarounds.
Download the Arch Linux ISO from https://archlinux.org/download/ or use this direct download link: archlinux-x86_64.iso
Then open USBWriter and write the Arch Linux ISO to your USB flash drive. NOTE: Before you click “Write” make sure you have the correct Target device.
3. Boot from the USB Flash Drive
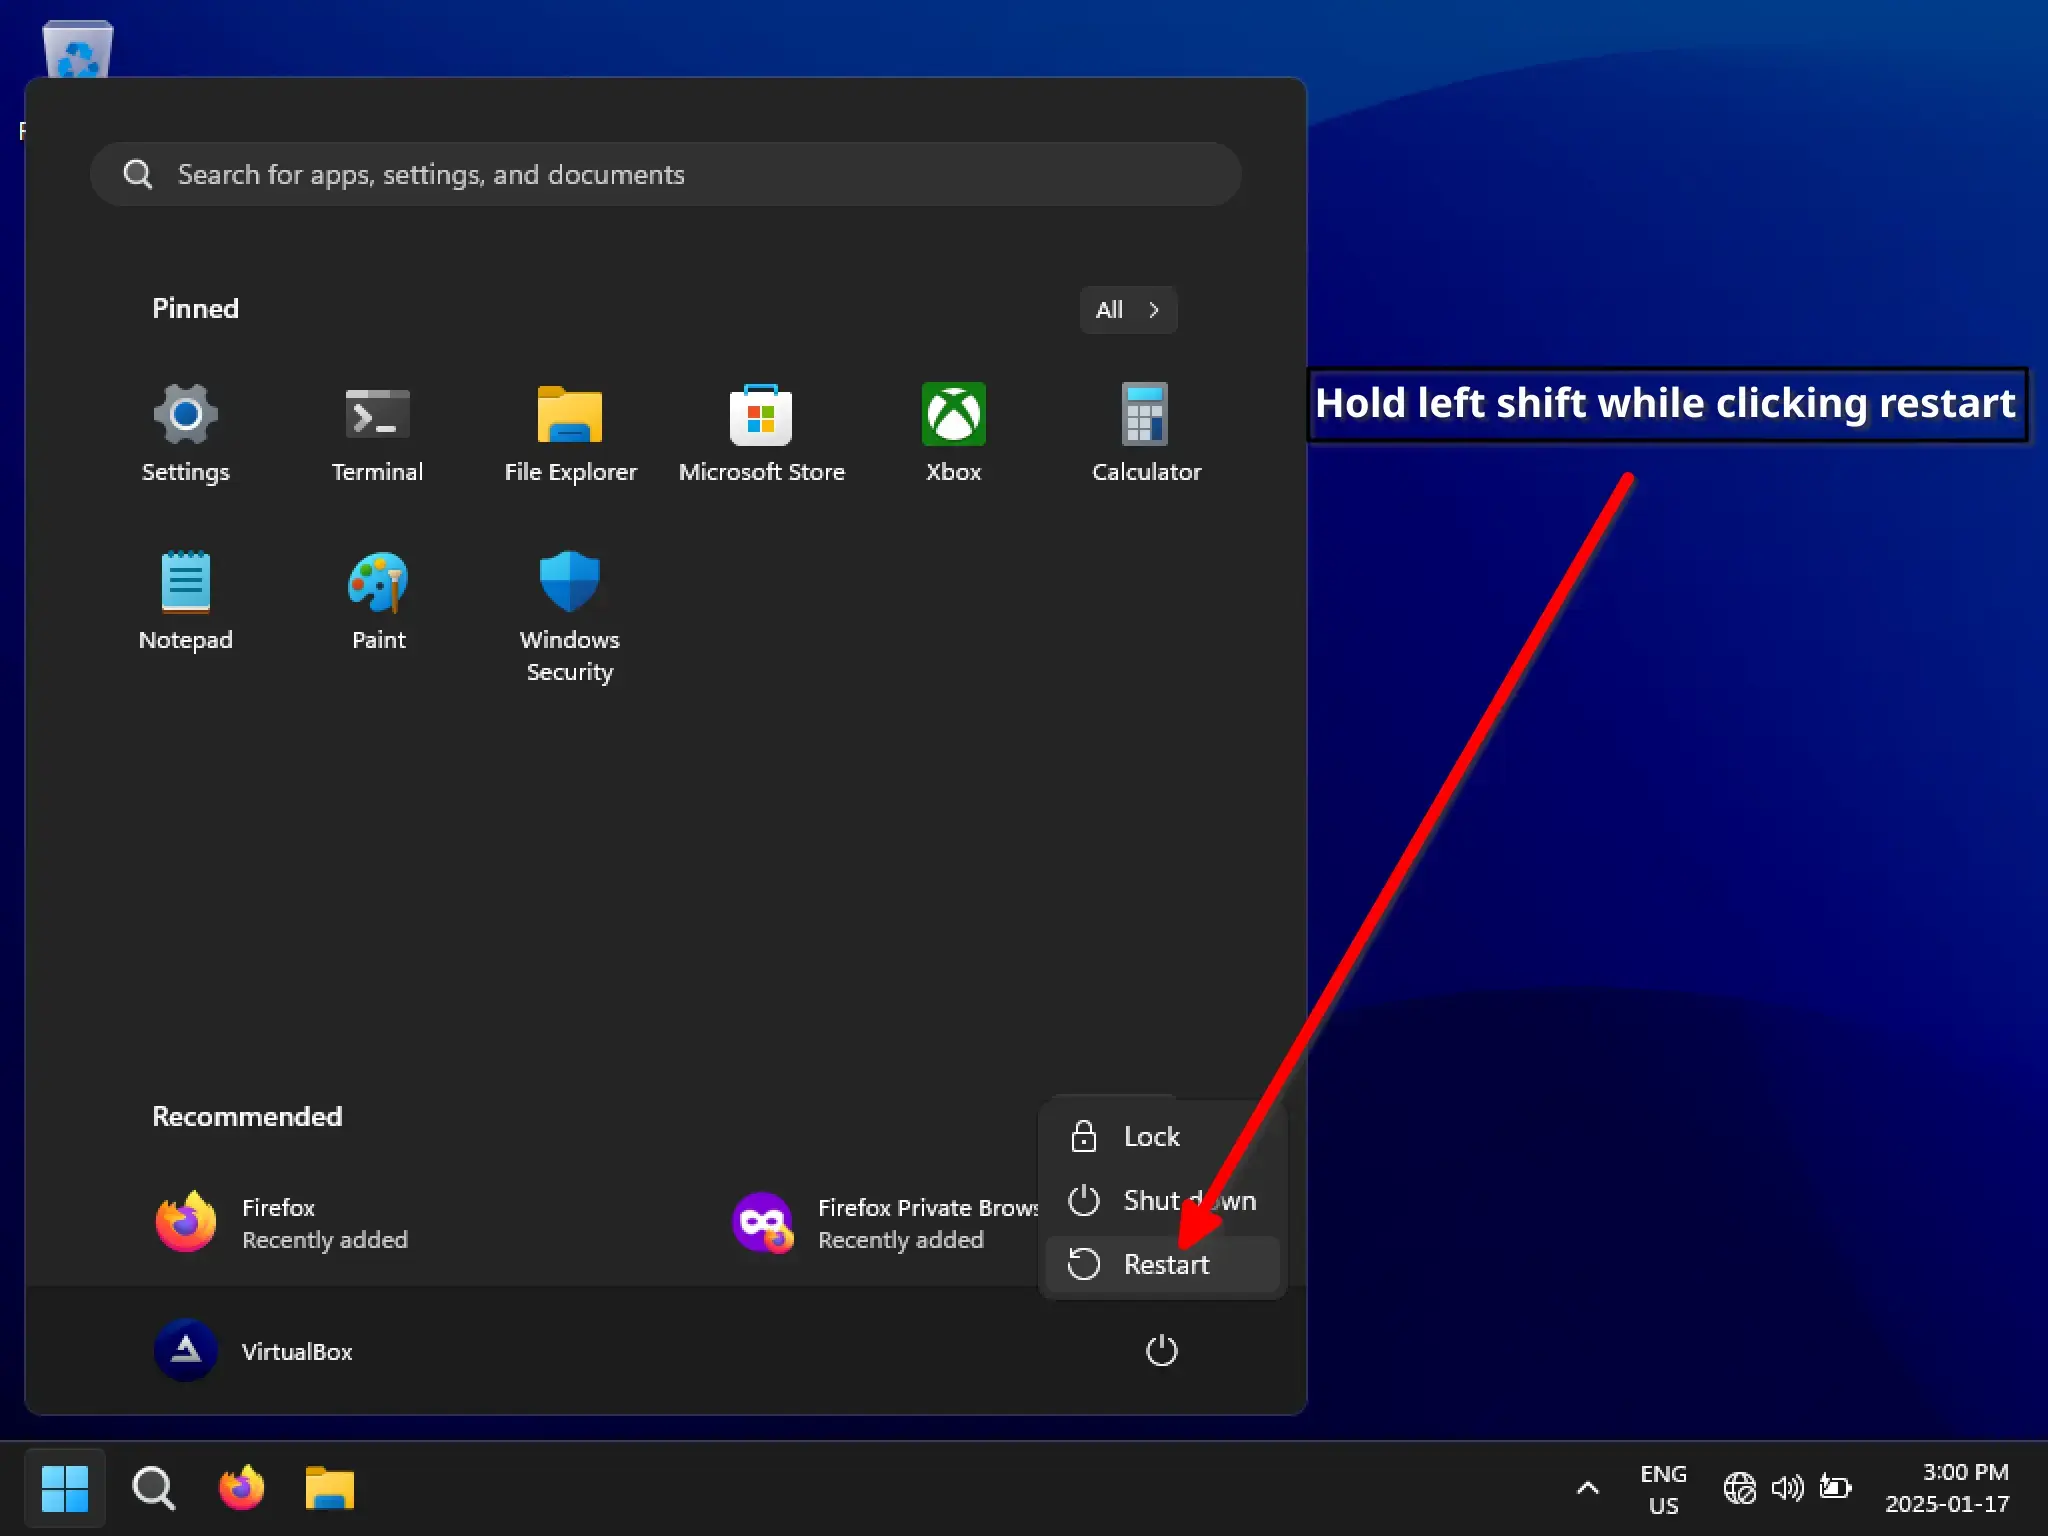
In windows if you Shift + Click the Restart button it will allow you to select a device to boot from after restarting.
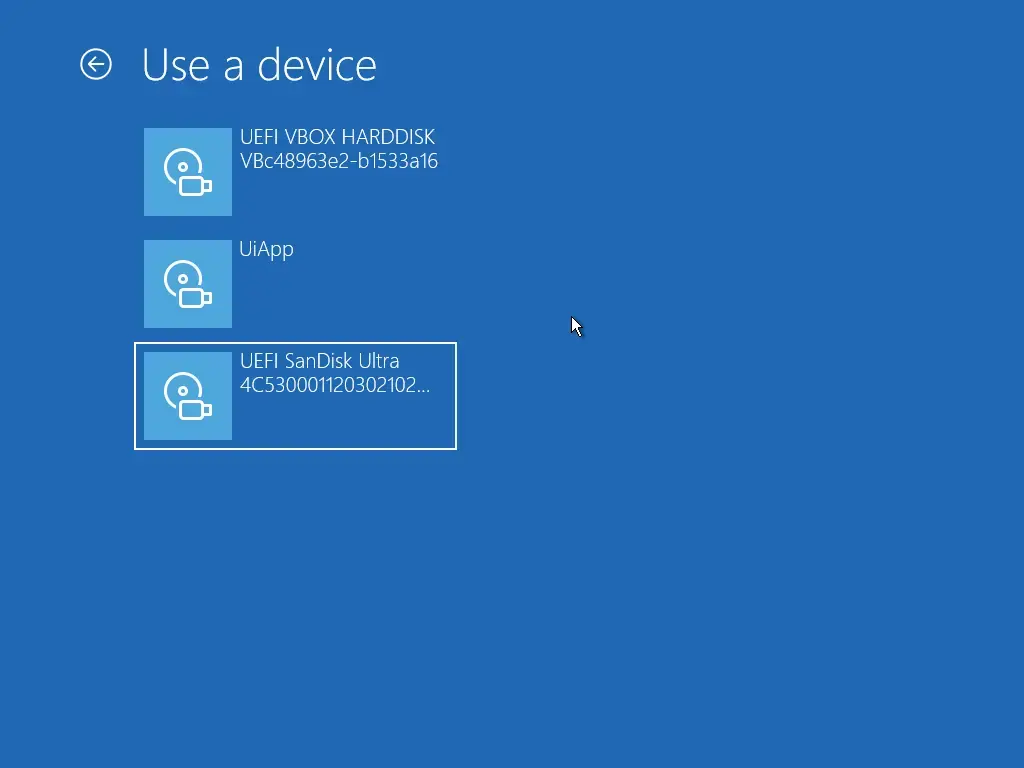
Then after restarting you should get the following screen:
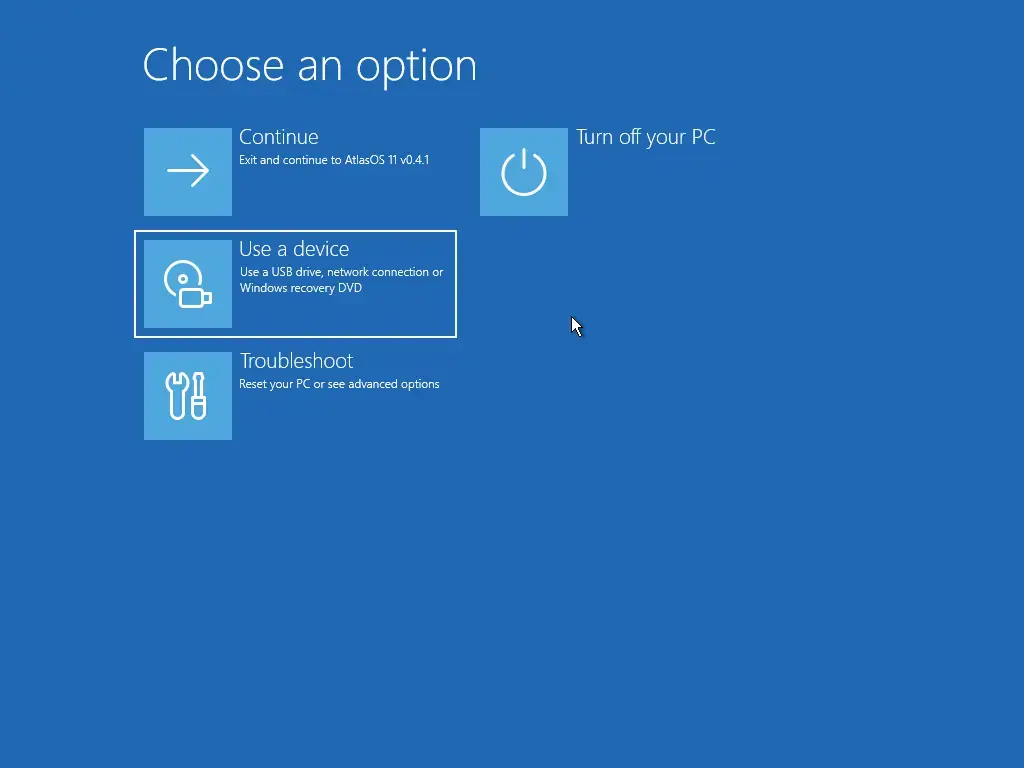
Click Use a device then click on your USB Flash drive to boot from it. In my case it’s the UEFI Sandisk Ultra:
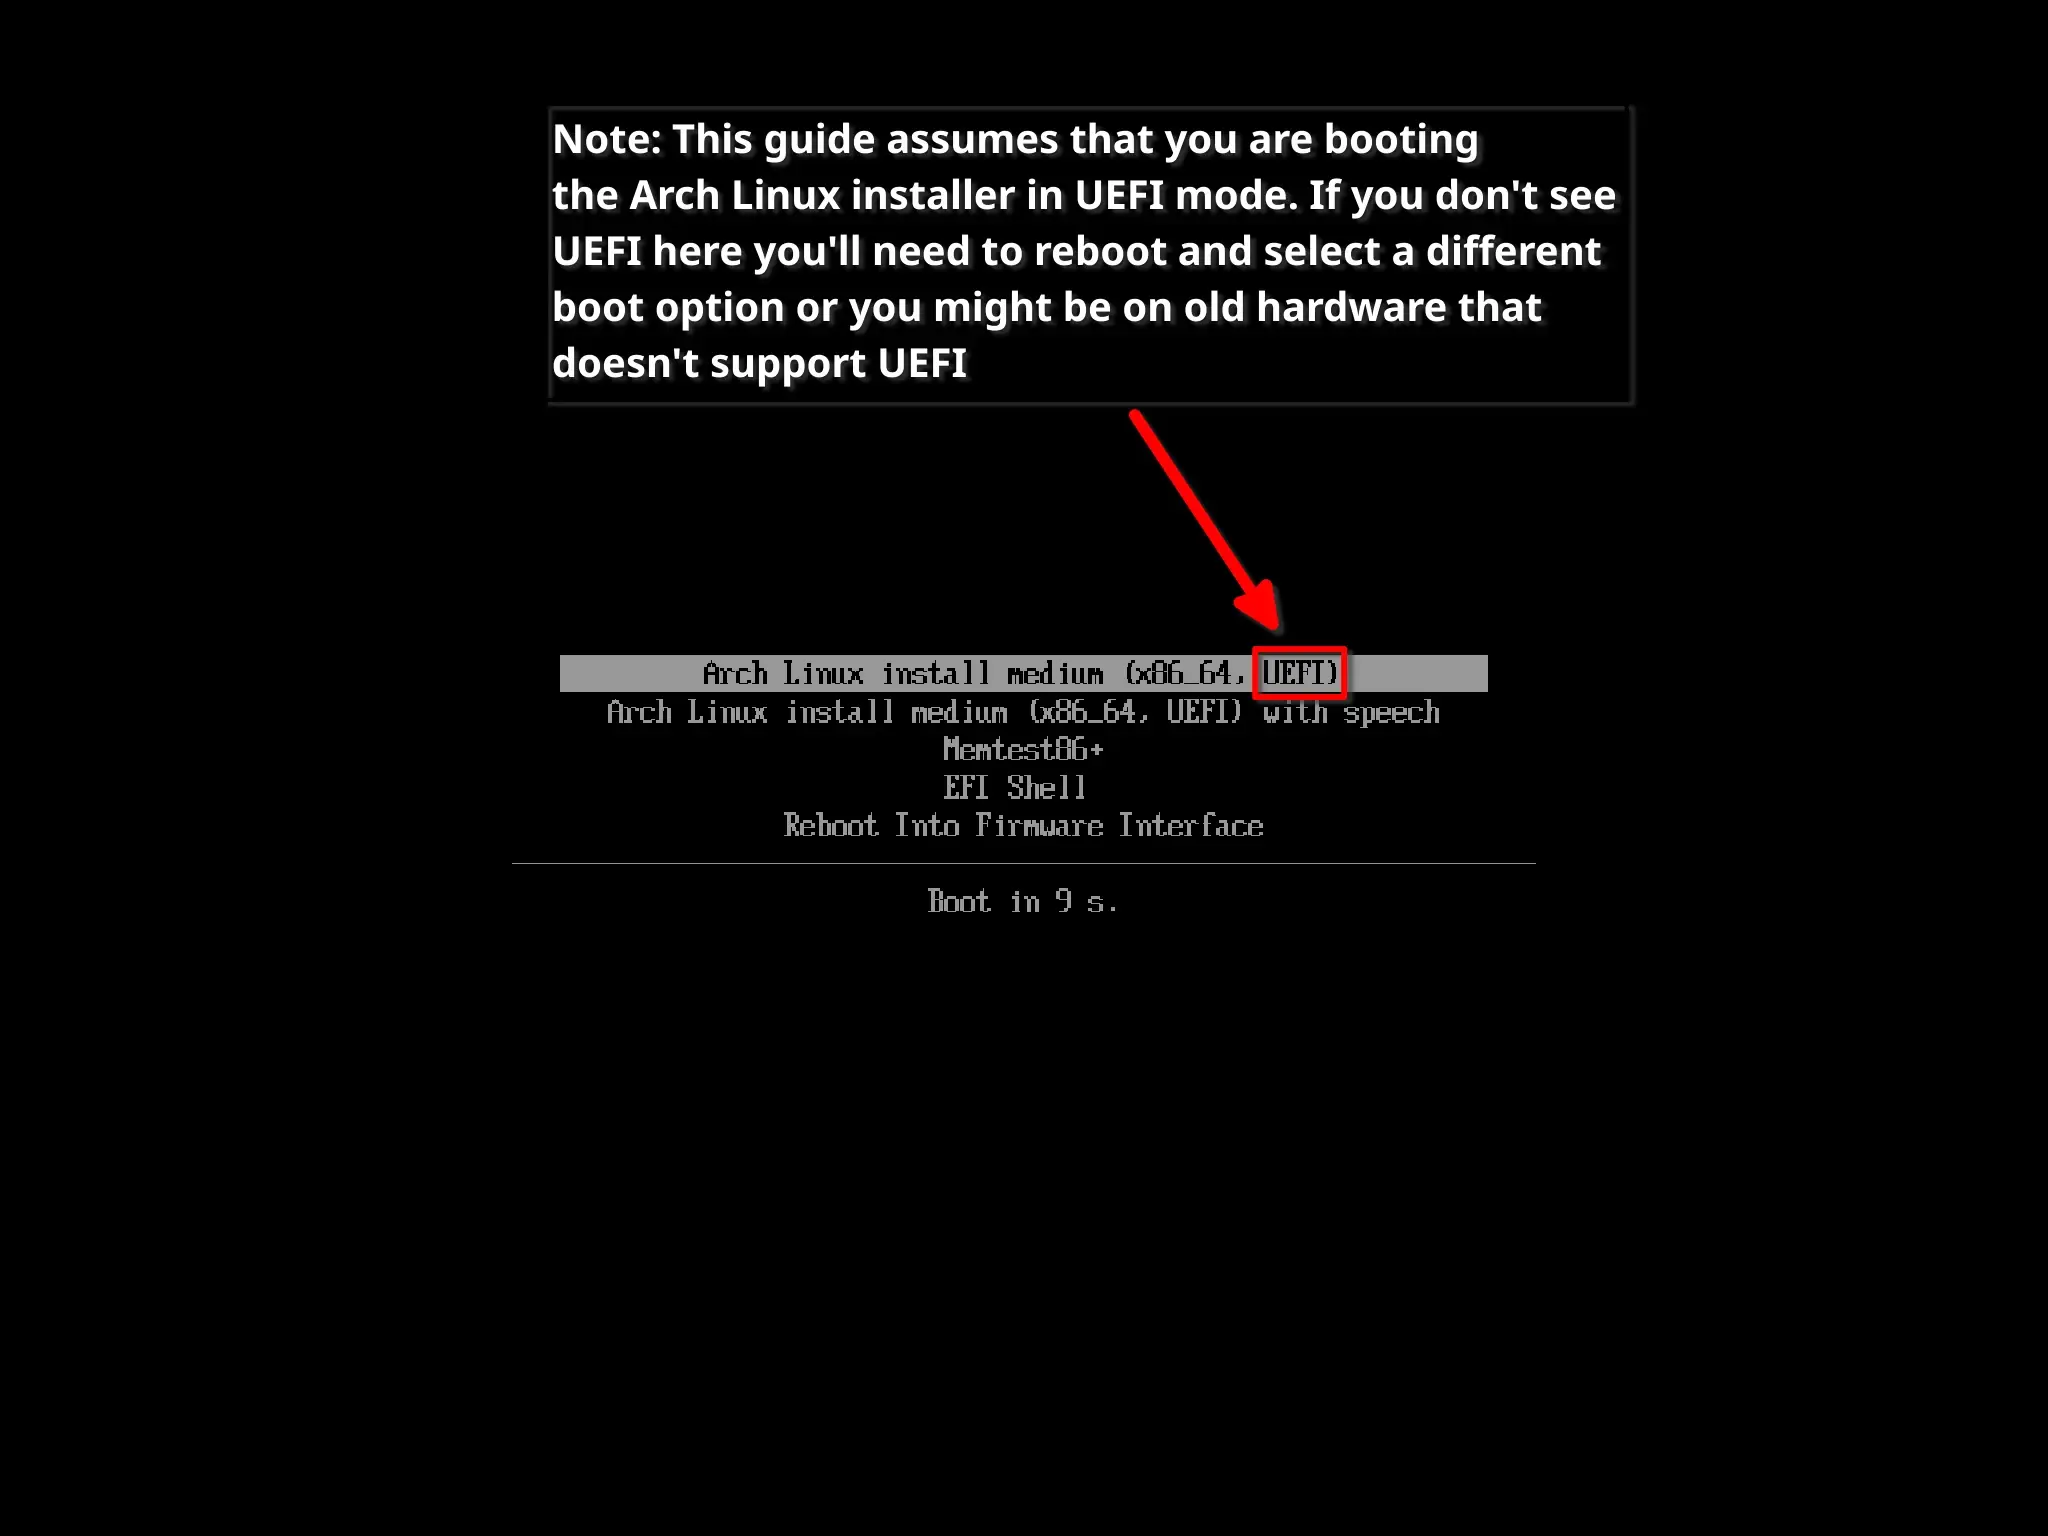
When booting from the flash drive you should get the following screen to appear. Note that you need to make sure you are booting in UEFI mode for this guide to work.
4. Adding Linux Partitions
Because we have Windows on the same drive as we want to install Arch Linux we have to manually partition it to prevent the Arch Linux installer from deleting Windows.
The first think you need to do is identify the path of your storage device (aka hard drive or ssd).
Run the fdisk -l command to see you storage drives:
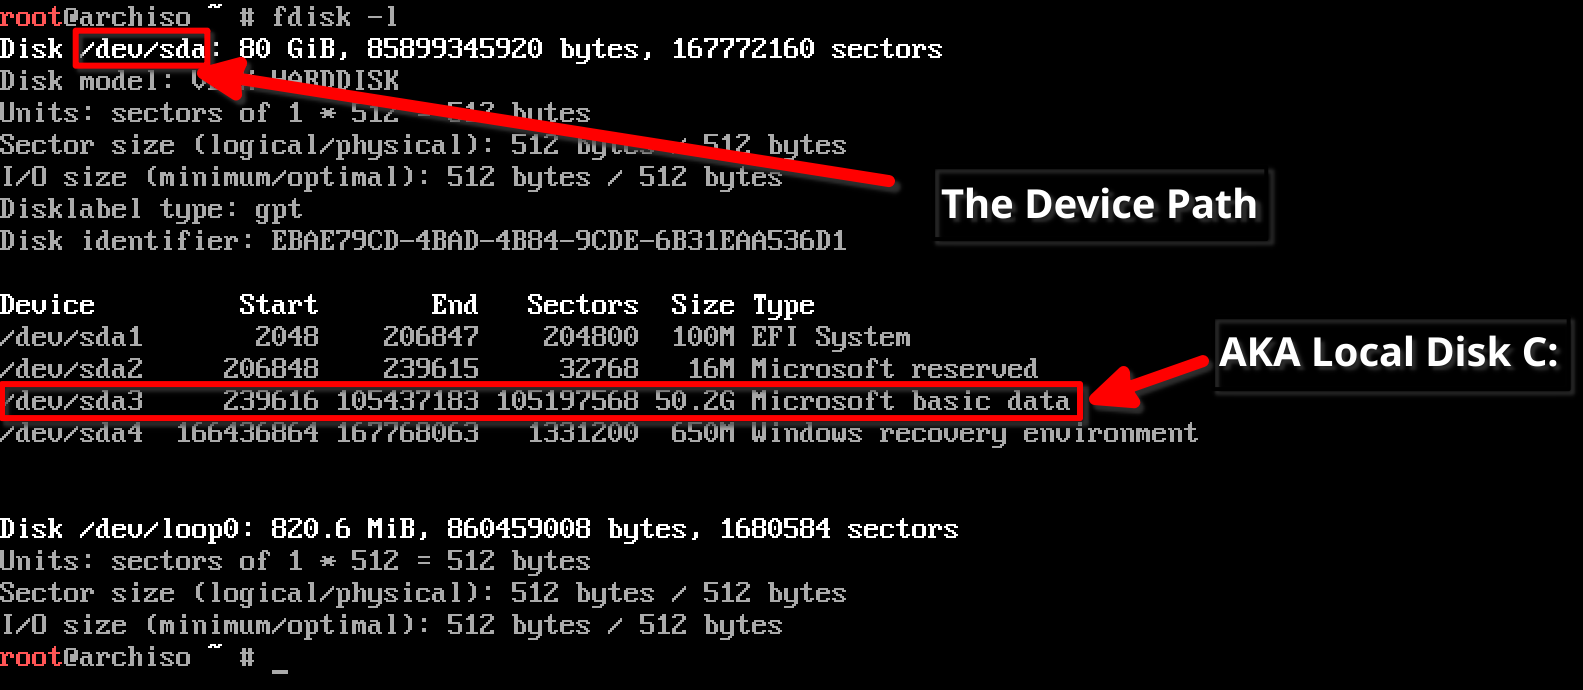
Instead of /dev/sda as the device path you might have something like /dev/nvme0n1. Whatever it is make note of or if you forget you can always run the fdisk -l command again
In the above example I identified /dev/sda3 as my main Windows partition aka Local Disk (C:). We basically want to make sure we leave that partition alone. The EFI System partition that is on the same drive we’ll use later for booting Linux as well. Currently, it’s being used to boot Windows.
We’ll start by adding two partitions to our device/disk using fdisk.
Run fdisk /dev/xx replacing /dev/xx with the path to your device that you noted earlier, for example /dev/sda or /dev/nvme0n1. Do not use the partition path. In my screenshot above /dev/sda1 to /dev/sda4 are partitions. Make sure you use the device path instead.
In my case it’s /dev/sda without the numbers, but it could be something like /dev/nvme0n1.
When running fdisk /dev/xx you’ll get a prompt like this:
Command (m for help):
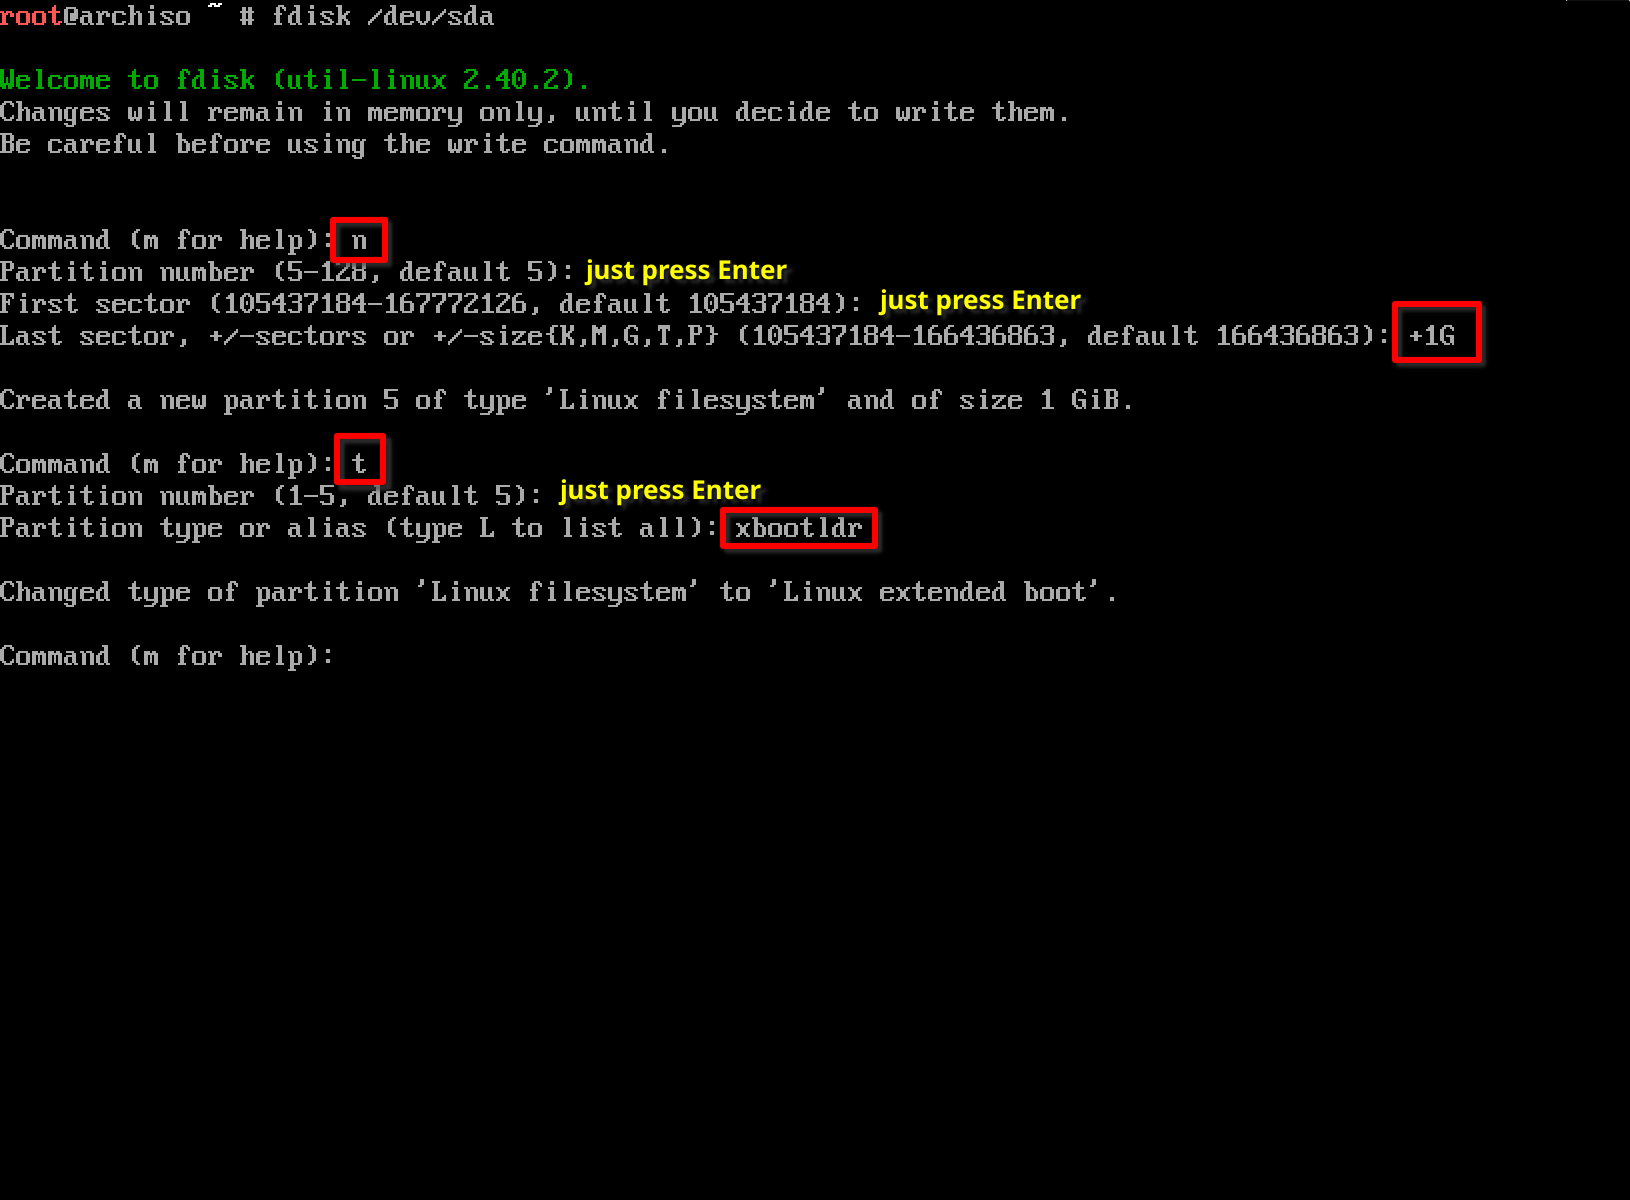
Just type n and press enter to create a new partition. The first partition we are creating is a linux extended boot partition. It is used as part of the boot process and is where are linux kernel will reside. We need to create it because our Windows boot partition is too small for both Windows and Linux.
You’ll then get a prompt to enter a partition number. Leaving it blank will use the default value which should be fine. So just press Enter.
For First sector just press Enter again to use the default. This is the starting point of your new partition.
For last sector type +1G. This will create a partition of 1GB.
Now type t to change the partition type of the partition we just created. It will ask for a partition number. Most likely the default is the one you just created but verify and if it is press enter again.
When you see the following prompt:
Partition type or alias (type L to list all):
type xbootldr and press enter.
Your progress should look something like the following:
If you made any mistakes you can cancel everything and close fdisk by pressing Ctrl + C then start over by running fdisk /dev/xx again.
Now we’ll add another partition. This will be our main/root partition for Linux. The big one. Type n and press enter to create another partition.
For Partition number use the default and just press enter again.
For First sector use the default and press enter again.
For Last sector use the default again.
It should then say it created a new partition and the size should be close to the amount of unallocated space you created in Windows Disk Management earlier.
You can run the p command in fdisk to see the partition table and if it looks good type w and press enter to write the partition table and exit fdisk.
Your entire progress including the first partition you created should look something like this. Of course if you ran the p command in fdisk there will be additional output. 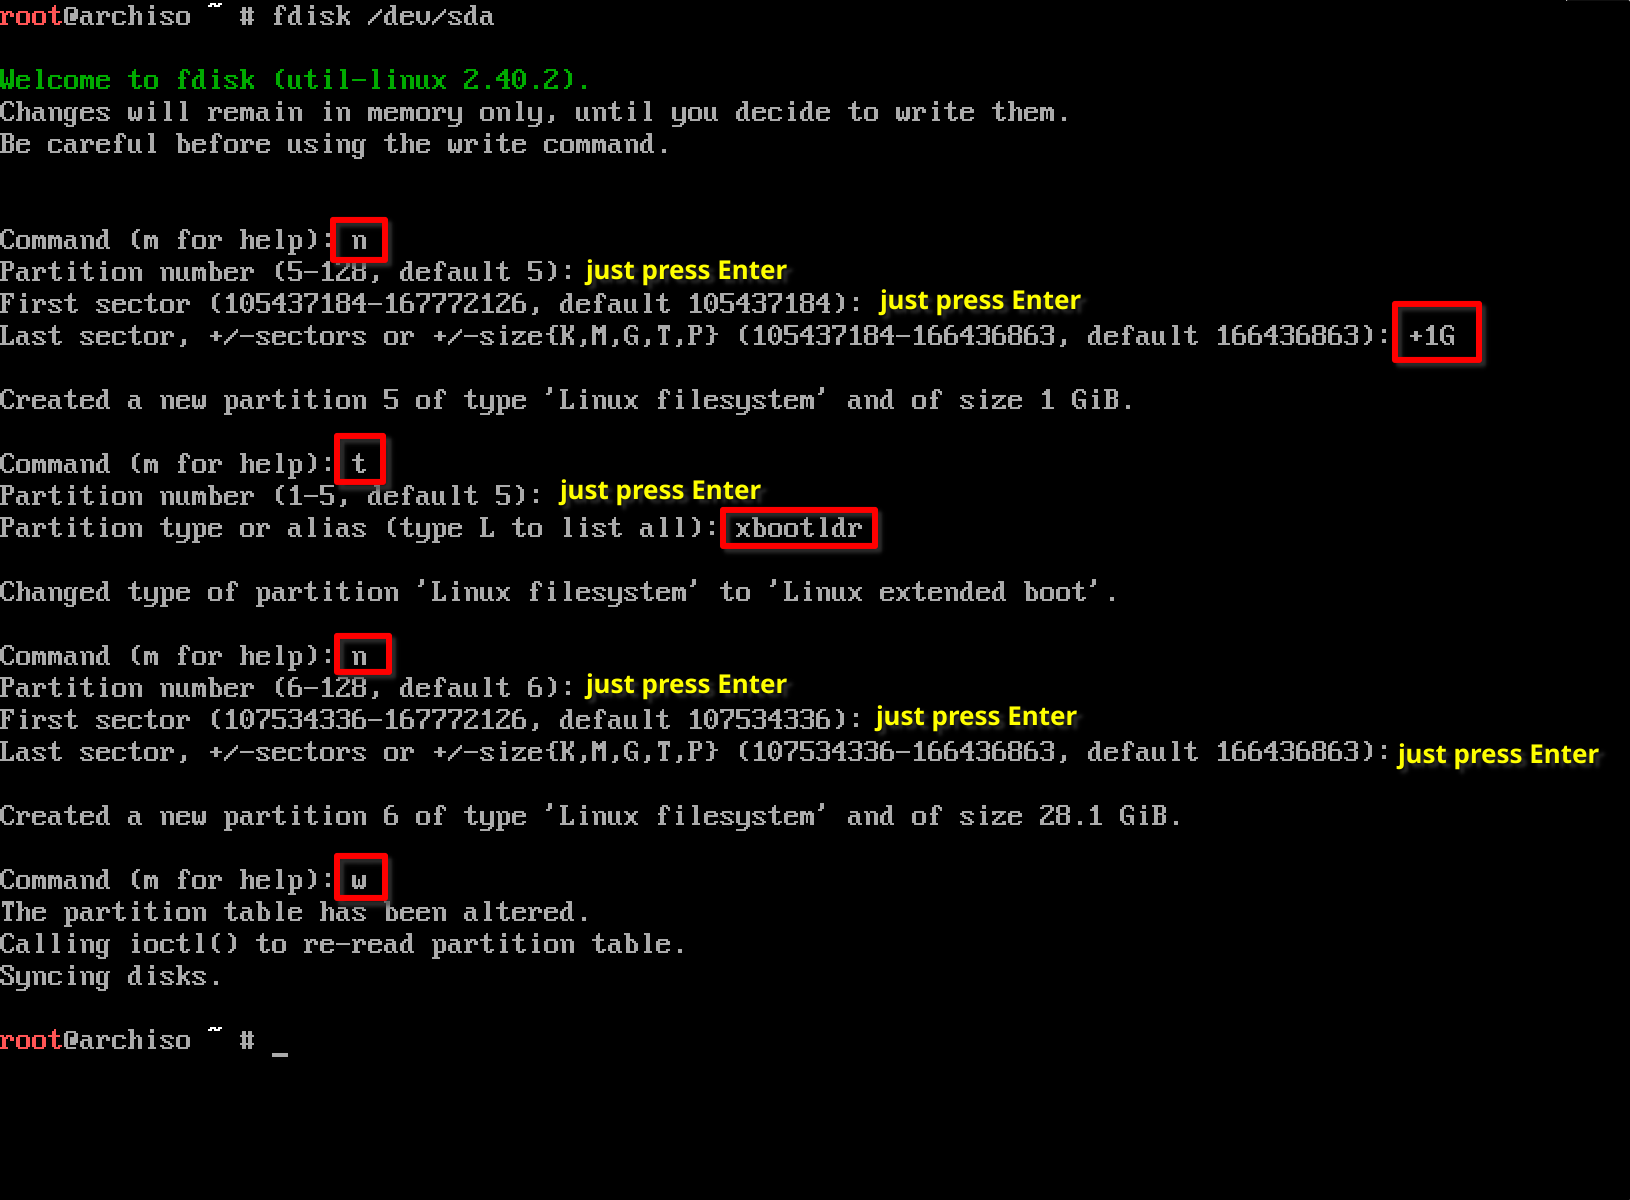
You can verify you have the right partitions by running fdisk -l once again: 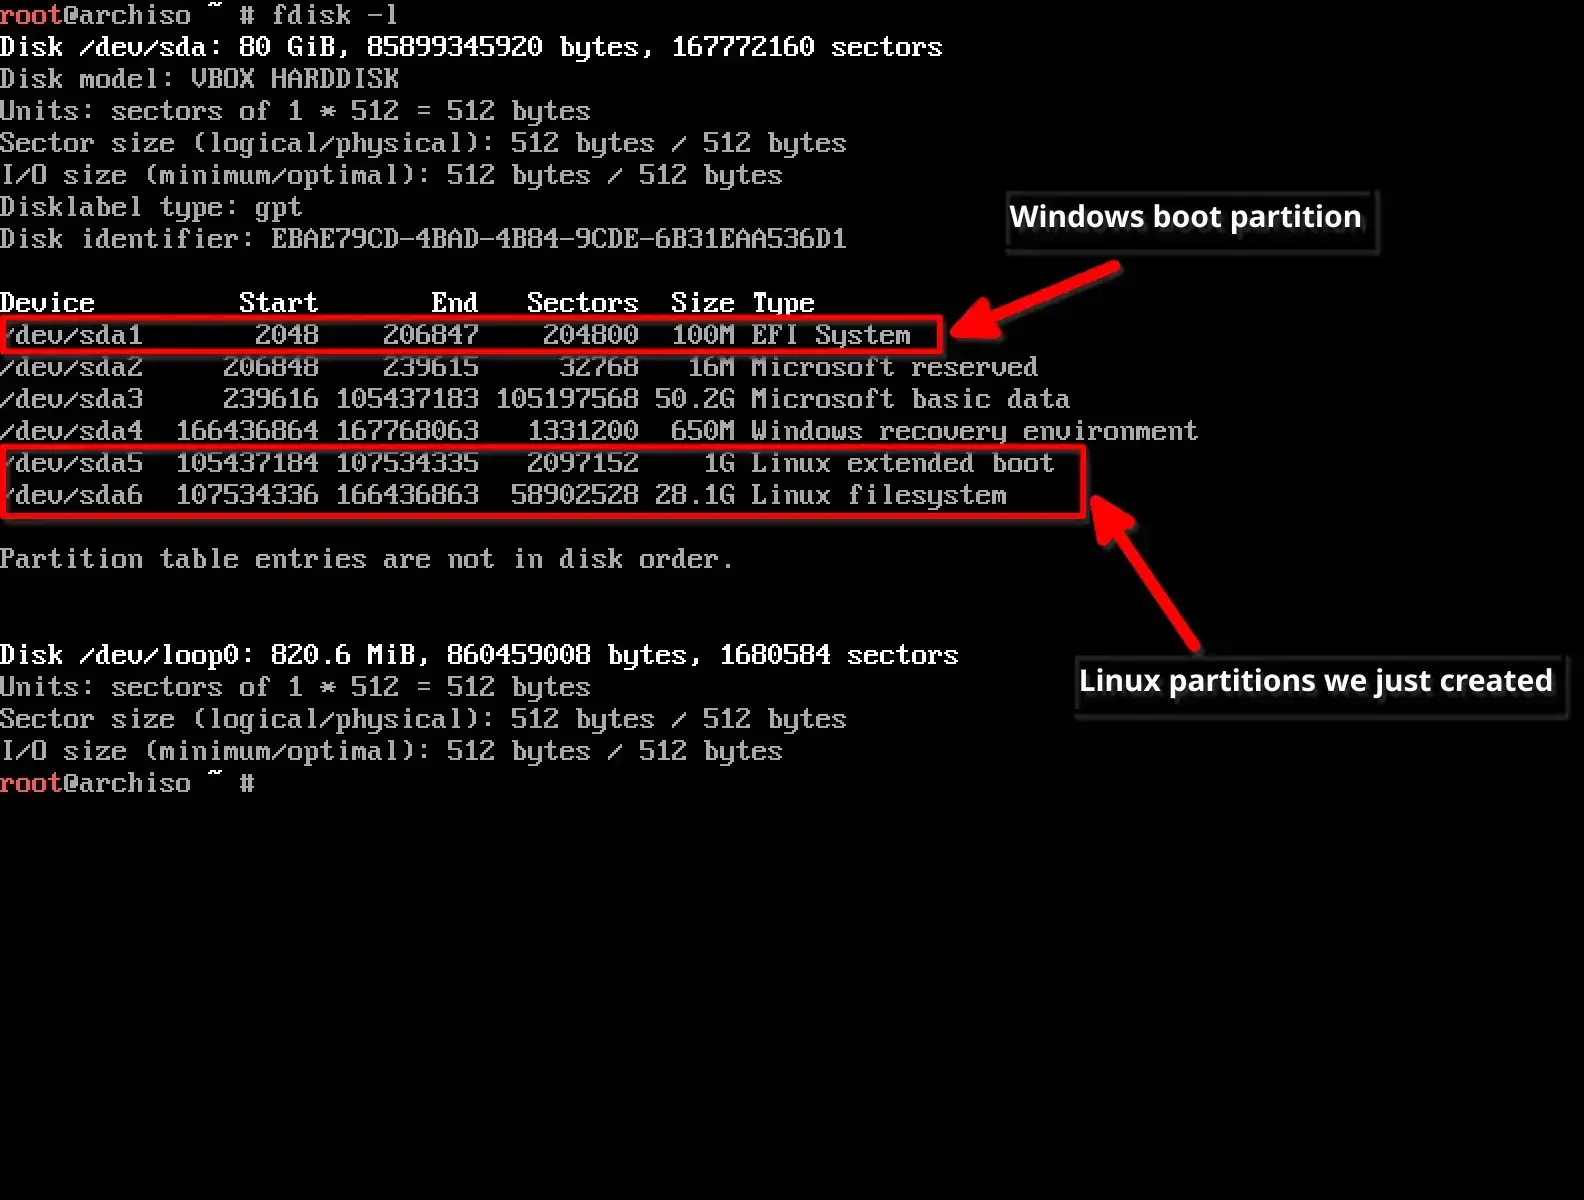 The important partitions are the Windows boot partition and the two Linux partitions we created.
We’re going to format the two partitions we created and mount all three (EFI System, Linux extended boot, and Linux filesystem)
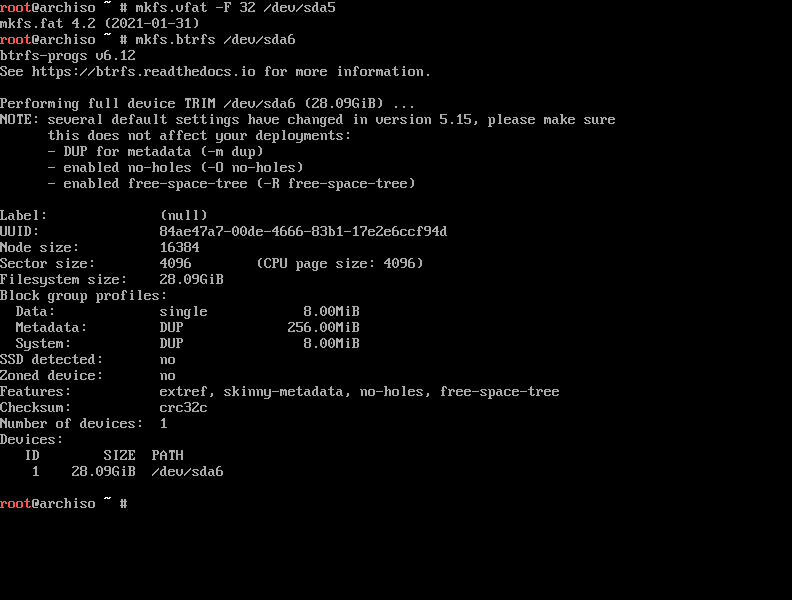
Start by formatting your Linux extended boot as FAT32 by running the following command
Replace /dev/xxx with the path to your Linux extended boot partition. In my case /dev/sda5.
Then format the root partition as btrfs:
Replace /dev/xxx in the above command with the path to your Linux filesystem partition. In my case /dev/sda6.
Your progress with formatting the above two should look something like this:
After formatting our two partitions we are going to mount them. You can think of mounting the partitions like giving them a drive letter in windows. It essentially gives you access to read and write from the drive.
We’ll mount our root partition at /mnt. See the below image for how to mount it. Of course replacing /dev/sda6 with your root partition path: 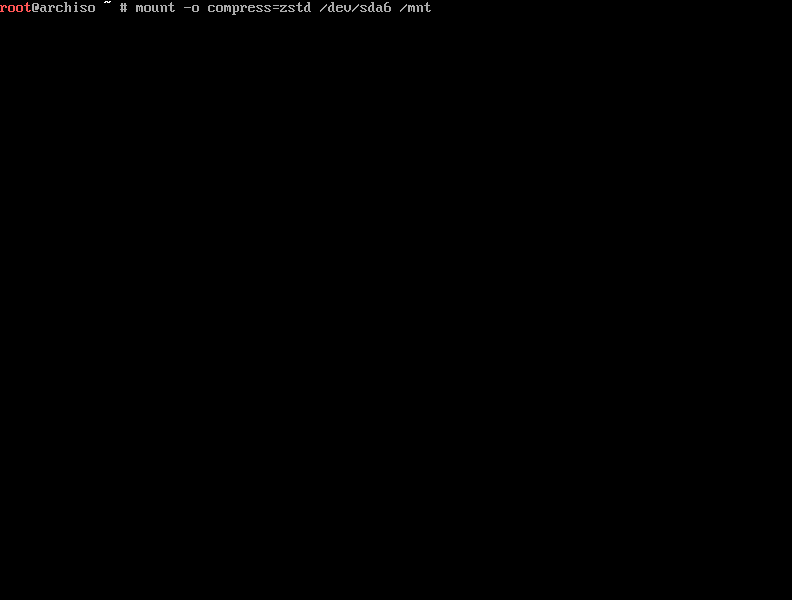
We’re now going to create a boot directory in /mnt by running the following command:
Then mount our Linux extended boot partition in it:
Replace /dev/xxx with your Linux extended boot partition.
Now create the efi directory in /mnt.
And mount your EFI System partition aka Windows boot partition in it:
All together the mounting process should look something like this: 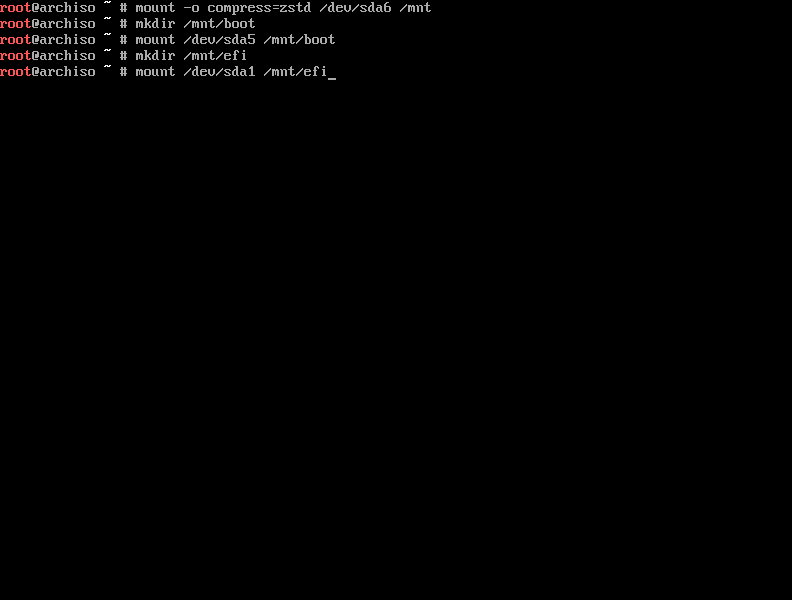
Finally verify your mounts by running lsblk. It should look something like this: 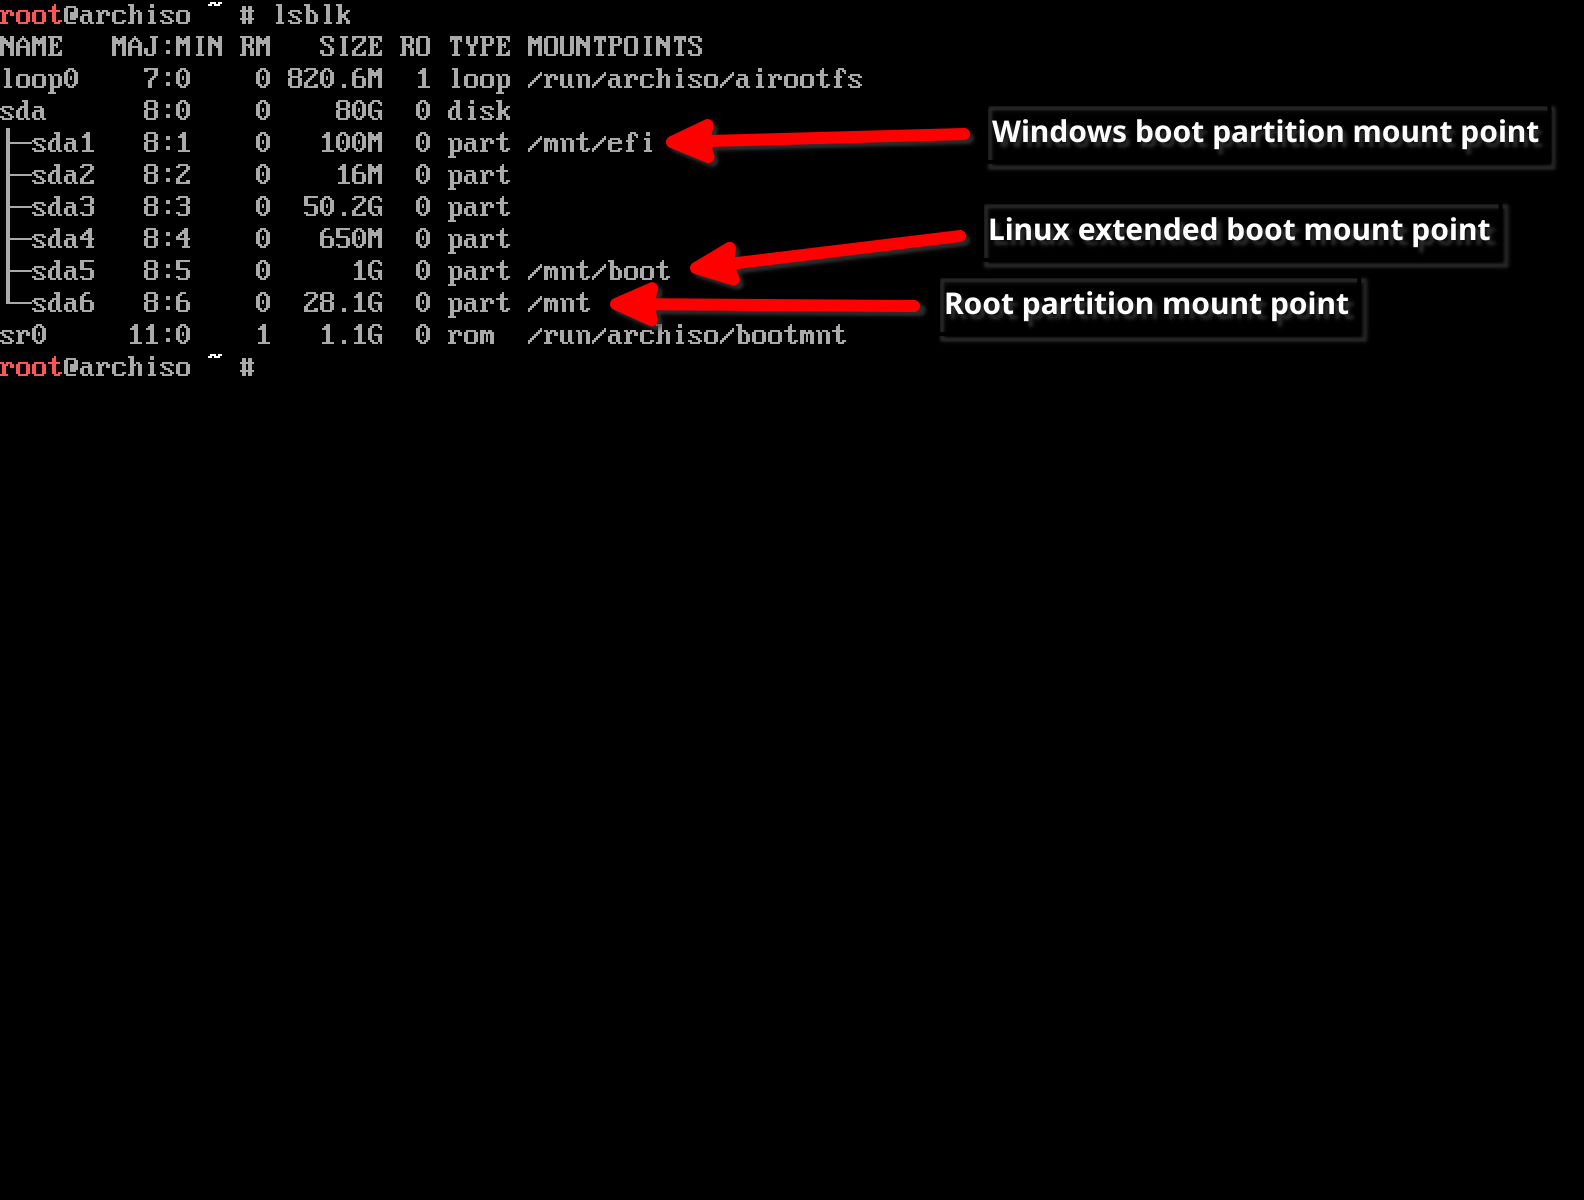
5. Installing Arch Using archinstall
Now that the most complicated part of this guide is over let’s install Arch Linux.
Start by running the archinstall command: 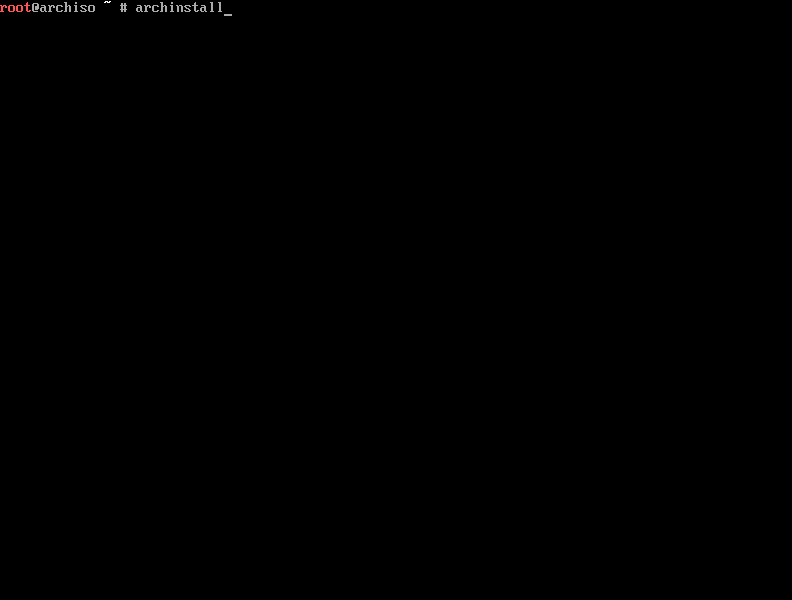
You can navigate the menu using arrow keys, Enter, and Esc.
First thing select disk configuration. 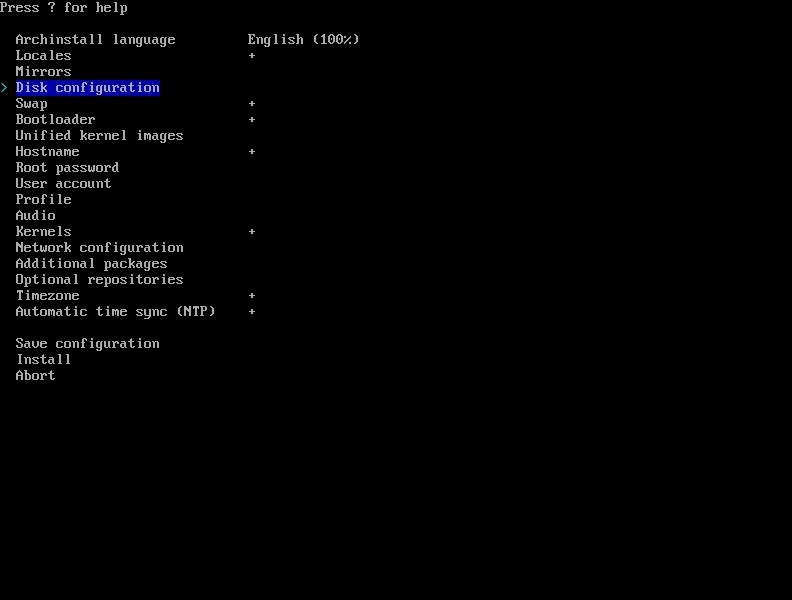
Then partitioning 
After that select pre-mounted configuration 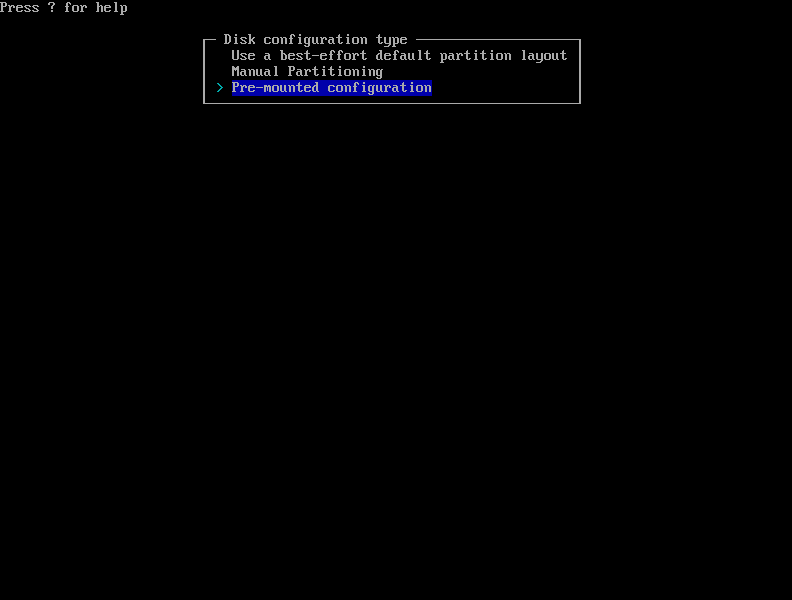
Then type /mnt in the input box 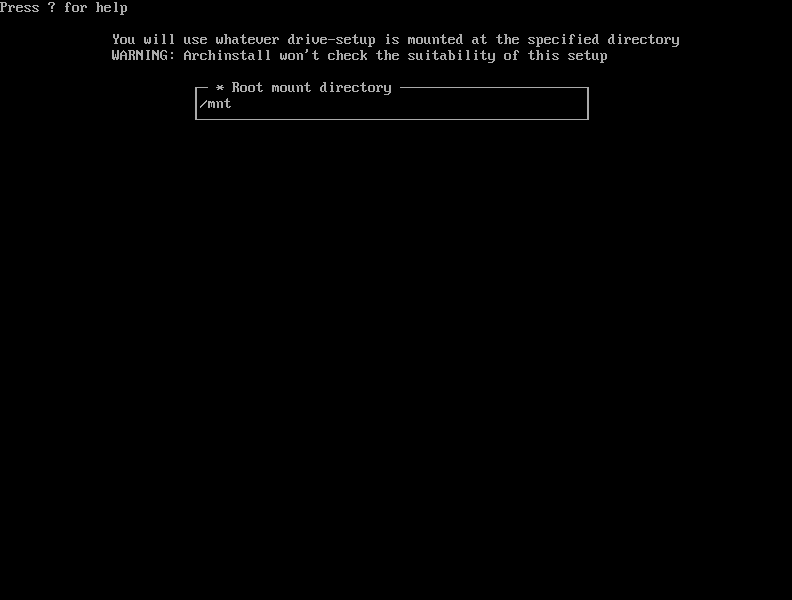
Next exit out of partitioning: 
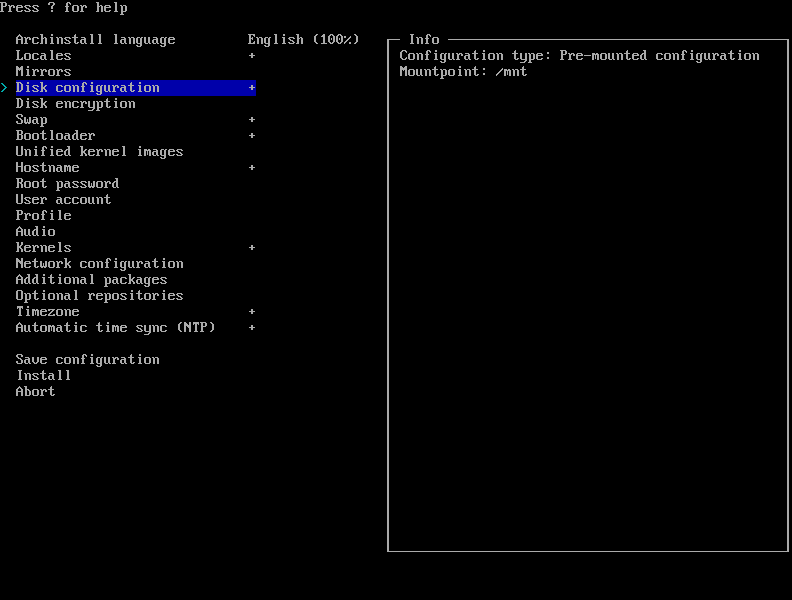
Verify you see Configuration type: Pre-mounted configuration
Mountpoint: /mnt when Disk configuration is highlighted 